|
|
 |
 |
|
 |
|
|
 |
| |
Created: 07.05.2006 - Updated:
07.05.2006
A beginner's guide to
outdoor cheats and
landscaping |
| |
Created: 07.05.2006 - Updated:
07.05.2006
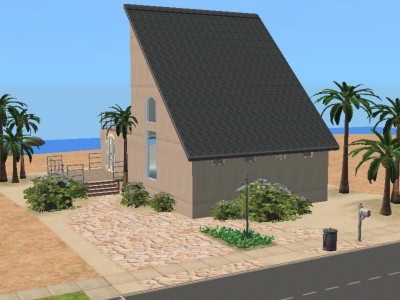
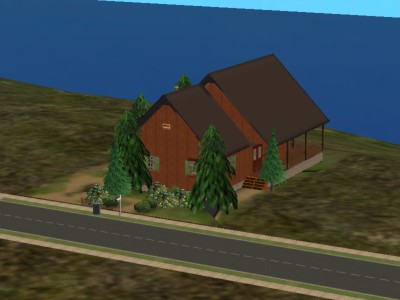
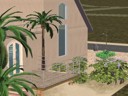
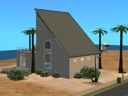
That's some view, isn't it?
I could sit here all day while my poor sims are
slaving away in the city. But we're here on Blue
Soup's Mountainside Village island terrain from
MTS2 to build some vacation homes for the poor,
hard-working things. The gardeners have off this
summer, too. I'm using Two Jeffs' No
Gardeners hack. I also found lots of plants
at 4ESF and MTS2. Go look - I'm in no
hurry.
Back already? OK - let's get to
work. First, though, prepare yourself. I'm about
to show you something really
scary... |
| |
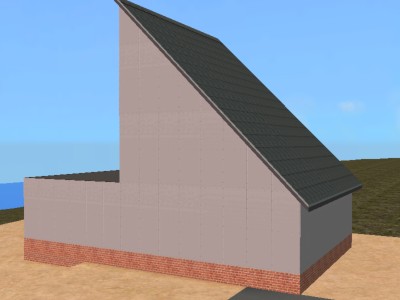
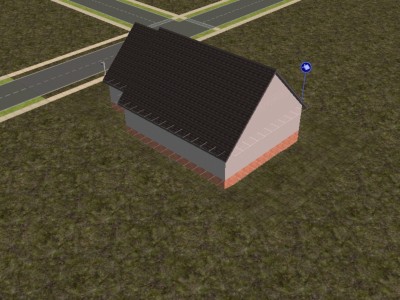
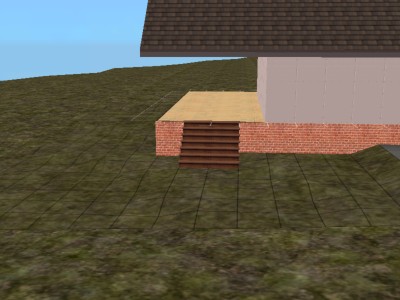
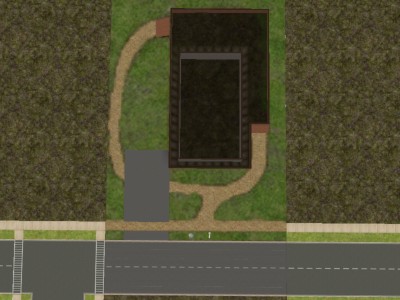
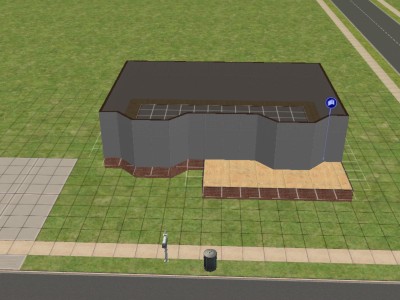
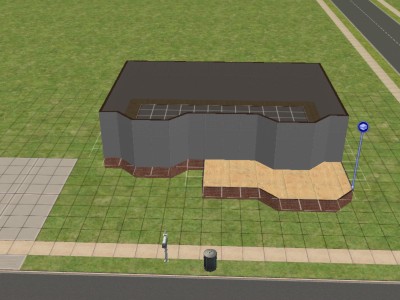
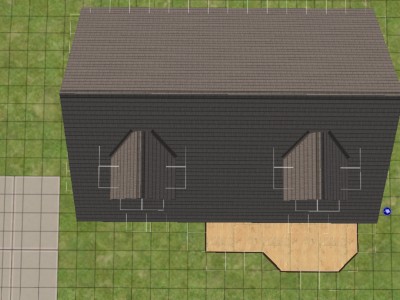
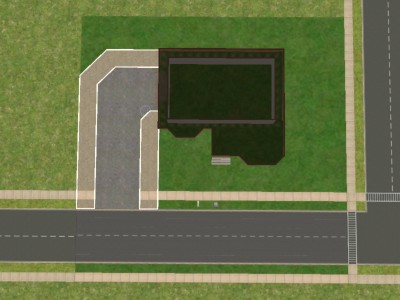
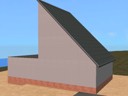
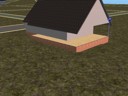
Created: 07.05.2006 - Updated:
07.05.2006
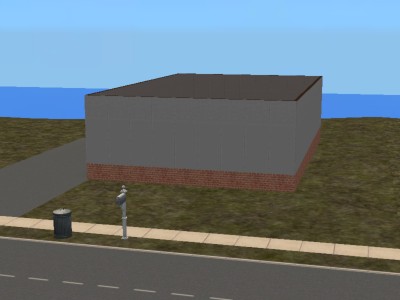
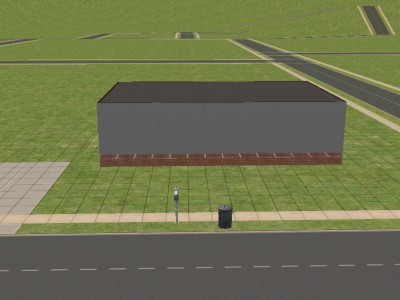
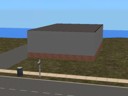
Frightening, isn't it? Ever
since Nightlife, with its ability to clone any
lot put into the Lots & Houses Bin, I've
been using bases to save building time. This one
is a 9x14 house base on a 2x3 lot. It's got a
basement, four walls, a driveway, and nothing
else. We're going to turn it into a little beach
house.
I've disabled shadows in order to
show clearer pictures. It's under Game
Options. |
| |
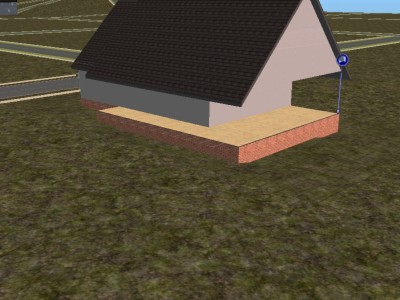
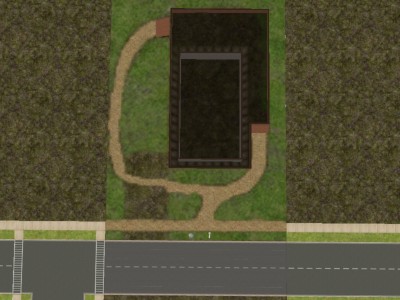
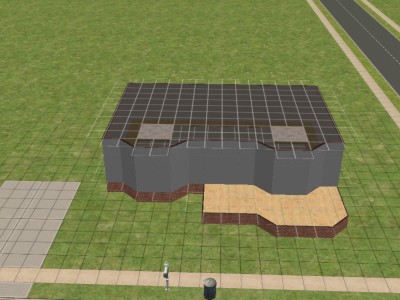
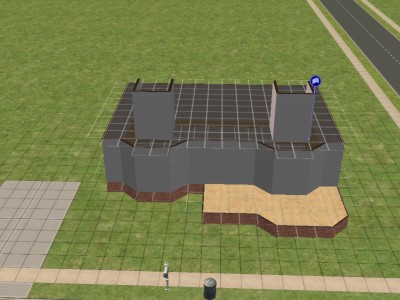
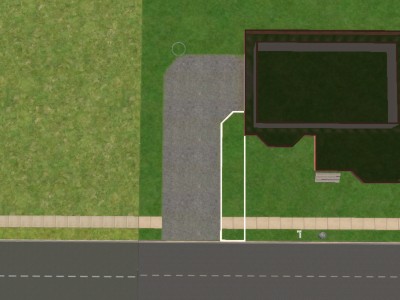
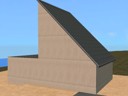
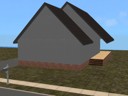
Created: 07.05.2006 - Updated:
07.05.2006
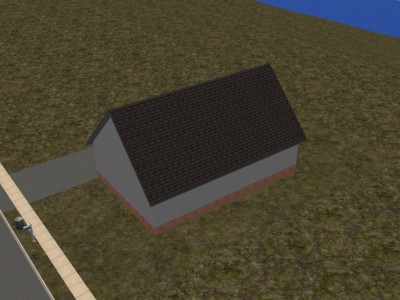
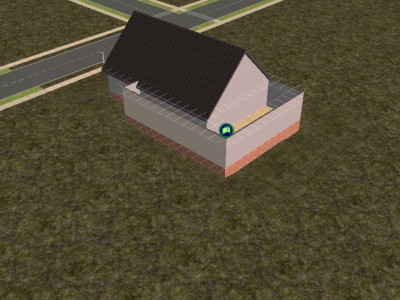
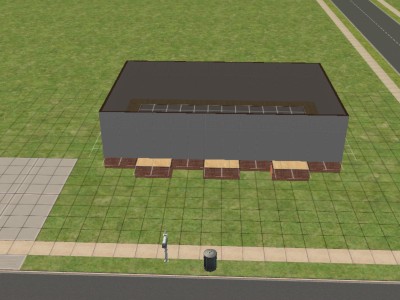
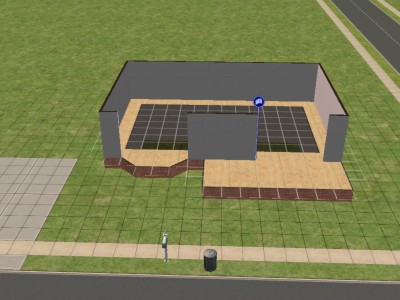
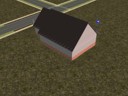
Once you've got your base
built, you should clone it because we're going
to use it for another project.
Construct
your roof. A gable shed roof creates a 5x9
(usable) area on the 2nd floor. The three tiles
under the lowest point of the roof aren't good
for
anything. |
| |
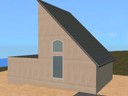
Created: 07.05.2006 - Updated:
07.05.2006
I found this weathered
siding on TazziannaLuck's simpage. It looks
beachy enough for me. Find something you like
and splash it
on. |
| |
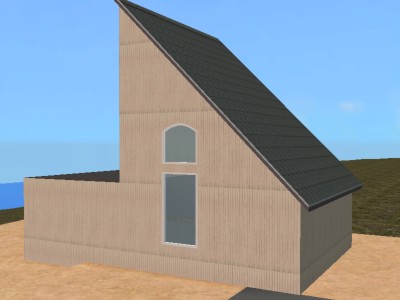
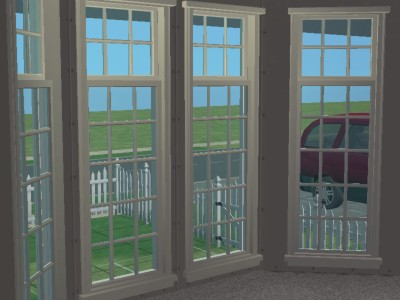
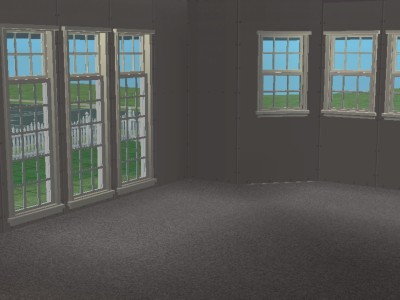
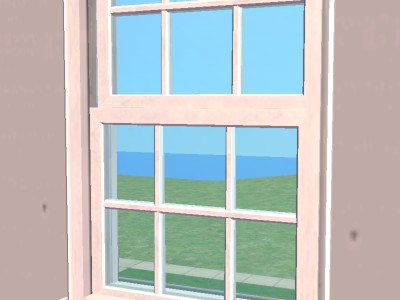
Created: 07.05.2006 - Updated:
07.05.2006
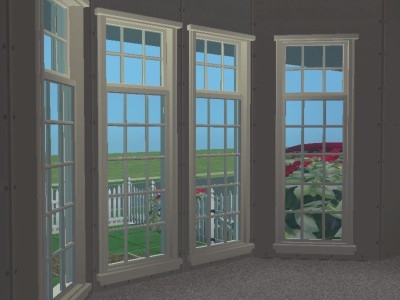
Big 2-story windows on each
side will light up both
floors. |
| |
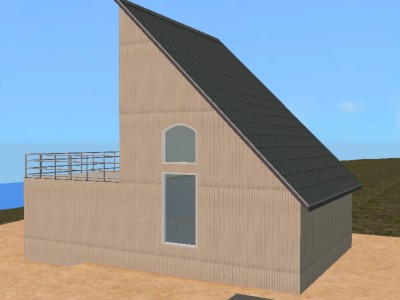
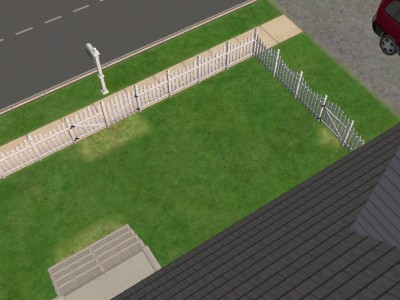
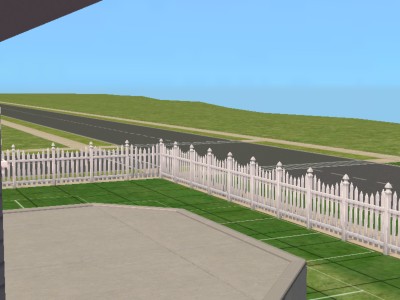
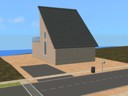
Created: 07.05.2006 - Updated:
07.05.2006
Some Tornado Steel fencing
and weathered board decking creates another 5x9
area overlooking the
water. |
| |
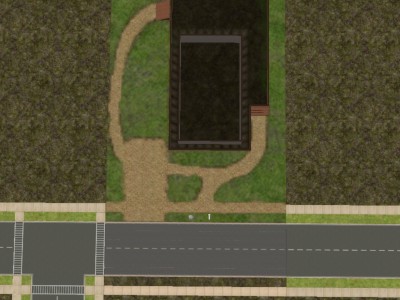
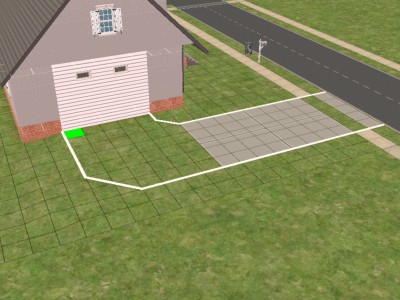
Created: 07.05.2006 - Updated:
07.05.2006
I want a pool on this lot,
which will go in back. The entrance should be
centered between the living area, pool, and
driveway. We'll also need some sort of path
between the entrance and the mailbox. We do
not want to block the view between the
street and the water so I'll use a bridge
foundation for the porch. To keep the informal
look, I'm going to use terrain paints instead of
flooring wherever I can, along with an invisible
driveway from MTS2.
Ready? |
| |
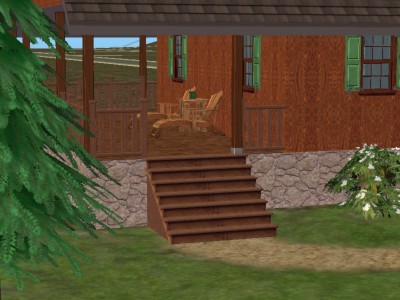
Created: 07.05.2006 - Updated:
07.05.2006
The 4x4 porch is finished
using the same decking and rail as the upper
deck, with steps in front and back. I covered
the entire lot in sand terrain paint, then used
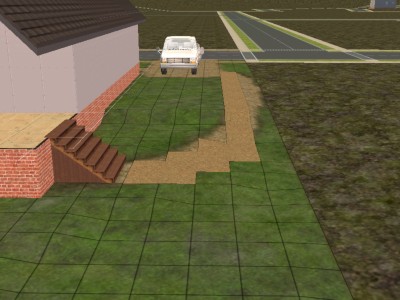
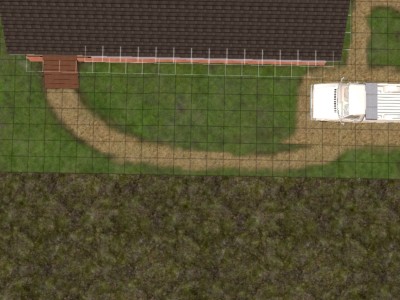
Simply Styling's pretty rock paint as driveway
and path surfacing. The path curves from the
steps to the driver's door. It also traces an
S-shape to the mailbox & trashcan and around
them. The island between the driveway and path
is filled with a yucca and some cacti. Palms in
3 heights follow the roofline down to the
sidewalk, thereby emphasizing an architectural
feature. The mailbox post is redesigned in a
weathered grey
wood. |
| |
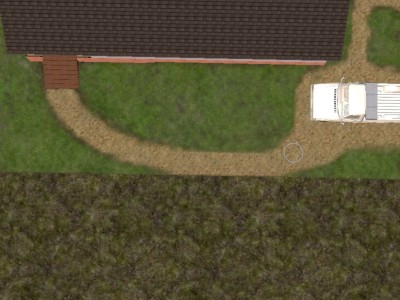
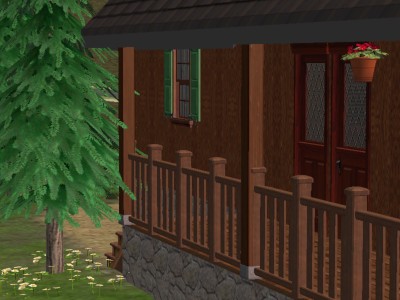
Created: 07.05.2006 - Updated:
07.05.2006
The looping path created a
blank face under the window, which I filled with
lavender bougainvillea. More of the shrub fences
off the backyard. I used a dried grass paint
from Tribecca Sims beneath the plants. Shadows
are still
off. |
| |
Created: 07.05.2006 - Updated:
07.05.2006
Peeking through Numenor's
glass walls, you'll see spiral stairs from MTS2
that connect the two floors. Although expensive
($3000), they're a great space-saver. This main
room - living and kitchen area - overlooks the
pool, which is surrounded by more of Simply
Styling's rock paint. I painted the pool walls
to match the inside floor. The invisible diving
board and ladder are also from
MTS2. |
| |
Created: 07.05.2006 - Updated:
07.05.2006
To paint pool
walls:
Open the cheat window by holding CTRL
and SHIFT, then typing C
Enter the cheat
boolprop constrainfloorelevation
false
Using your shovel tool, raise the
edge of the pool by 2 clicks or
so. |
| |
Created: 07.05.2006 - Updated:
07.05.2006
Select your paint and fish
around for the spot on the wall where it will
stick. I have the best luck near the top edge.
When you find it, hold down the SHIFT key and
click to cover all the
walls. |
| |
Created: 07.05.2006 - Updated:
07.05.2006
Using your shovel again,
level the edge you raised.
Open the cheat
window and type boolprop
constrainfloorelevation
true |
| |
Created: 07.05.2006 - Updated:
07.05.2006
Muted pastels and the glass
wall let that fabulous view act as the focal
point for your main room. Who needs
art? |
| |
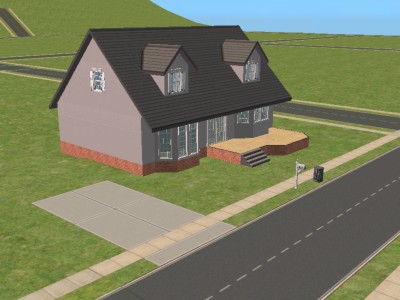
Created: 07.05.2006 - Updated:
07.05.2006
To enhance the appearance
of your little house, you can contour the
terrain to create a dune effect. If it's too
dark inside, you can add some small windows
under the roof edge like I did here. Then just
pop your finished house into the Lots &
Houses Bin to clone it so you can line a whole
street with these little
beauties. |
| |
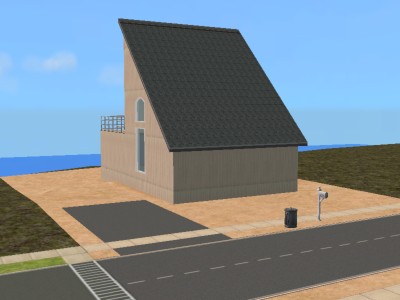
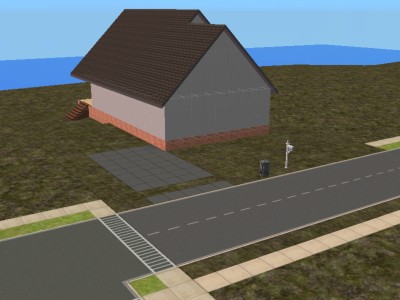
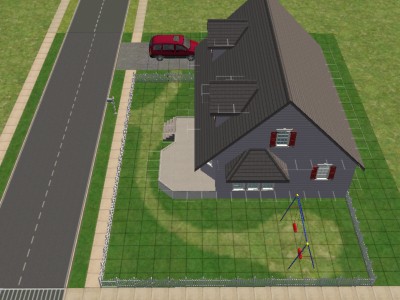
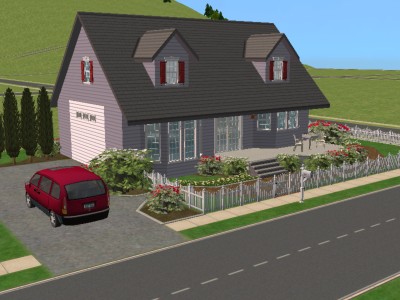
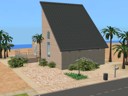
Created: 07.05.2006 - Updated:
07.05.2006
Here's how it looks in
Neighborhood view.
$22,407 - 1BR, 1 bath
unfurnished beach house with full basement,
pool, driveway, deck overlooking bay.
SOLD! Let's build a slightly trickier
one. |
| |
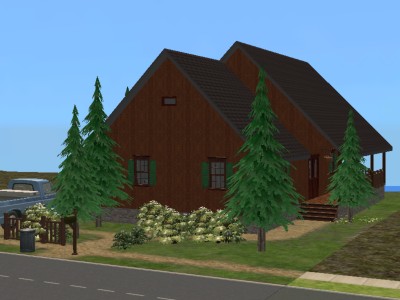
Created: 07.05.2006 - Updated:
07.05.2006
This one will be a little
lakefront cabin. We'll use the same 9x14 house
base on 2x3 lot as we used for the beach house.
You cloned your base, right? If not, you should
build another one and pop it in and out of the
Lots & Houses Bin so you can keep a
copy.
Shadows are still disabled here in
Mountainside
Village. |
| |
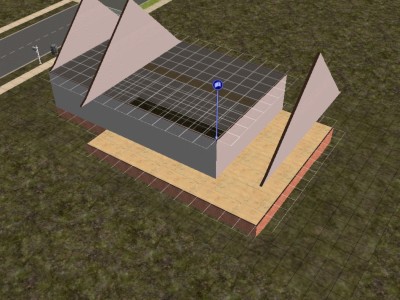
Created: 07.05.2006 - Updated:
07.05.2006
Cover your base with a
long-gabled
roof. |
| |
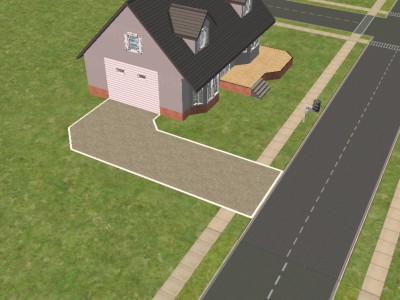
Created: 07.05.2006 - Updated:
07.05.2006
You can use lattice or
bridge foundation for the deck, but I chose the
solid one because I want to paint it. This deck
extends four tiles in back and two on the side
of the house. I left five tiles free in the
front to give it a staggered look.
That
sun is bright, isn't it? Let's cover our
deck. |
| |
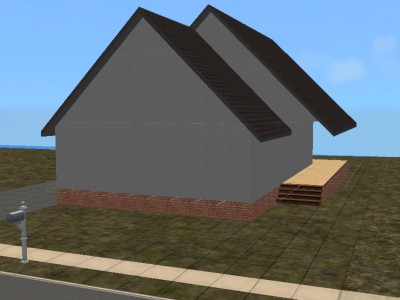
Created: 07.05.2006 - Updated:
07.05.2006
I built walls around the
circumference... |
| |
Created: 07.05.2006 - Updated:
07.05.2006
...then popped on another
long-gabled
roof. |
| |
Created: 07.05.2006 - Updated:
07.05.2006
I then removed the
walls. |
| |
Created: 07.05.2006 - Updated:
07.05.2006
We don't need this little
bit of the first roof and it will interfere with
a loft room, so I demolished it. That gives us a
5x9 loft area that wouldn't have been here if
the sun wasn't so
bright. |
| |
Created: 07.05.2006 - Updated:
07.05.2006
See the stagger? It doesn't
block the view much more than the base house
did, but effectively doubles our space. Add your
front
steps... |
| |
Created: 07.05.2006 - Updated:
07.05.2006
...and more in the
rear. |
| |
Created: 07.05.2006 - Updated:
07.05.2006
Now open your cheat window
and type moveobjects on. Remove the
sidewalk to make your property look a little
more
rustic. |
| |
Created: 07.05.2006 - Updated:
07.05.2006
To get a sharper edge on
your walk, use a stencil. I masked the areas
where I didn't want to paint the dirt path with
flooring so I could use a medium terrain paint
brush. Go ahead and paint your new dirt
path. |
| |
Created: 07.05.2006 - Updated:
07.05.2006
Remove your stencil, then
open the cheat window and type moveobjects
off. Using the same paint, trace paths
between your steps and driveway and then another
from the front steps to the mailbox &
trashcan. You'll want to go down to the lowest
level to avoid the covered by floor tile
message. |
| |
Created: 07.05.2006 - Updated:
07.05.2006
Because it's a shady
lakefront property, I'm going to use a patchy
grass paint as my base plant. There's no need to
stencil around the sidewalk because it's just
dirt and looks more natural if it's a little
uneven. |
| |
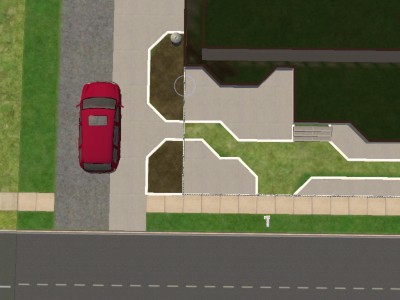
Created: 07.05.2006 - Updated:
07.05.2006
There's that invisible
driveway
again. |
| |
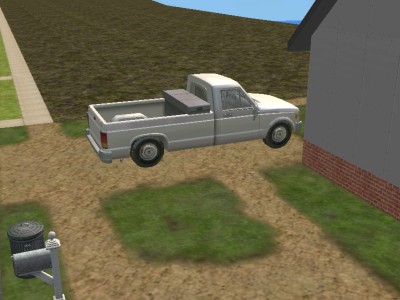
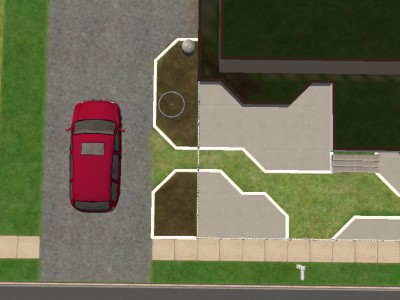
Created: 07.05.2006 - Updated:
07.05.2006
Now it's just dirt. I want
to make sure there's enough paint on the
driveway so I'll put a vehicle on it to
check. |
| |
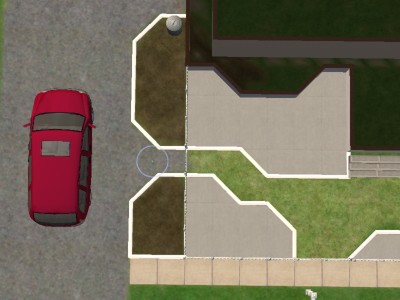
Created: 07.05.2006 - Updated:
07.05.2006
And it looks like we've got
plenty of clearance on the passenger
side. |
| |
Created: 07.05.2006 - Updated:
07.05.2006
See how the property slopes
gently toward the water? I want to keep that
natural slope, making sure that my sims can walk
between the rear steps and the driveway. The
rule is: if you can get a floor on it, your sim
can walk on it. In this case, the grade is
gentle enough that we won't have to play with
terrain
heights. |
| |
Created: 07.05.2006 - Updated:
07.05.2006
Now that I'm sure the path
will work, I'll remove the test
floor... |
| |
Created: 07.05.2006 - Updated:
07.05.2006
...and clean up the edges
with the smallest paint brush, then sell the
truck. |
| |
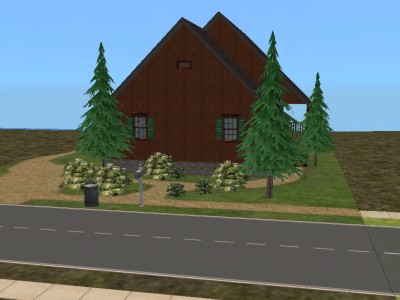
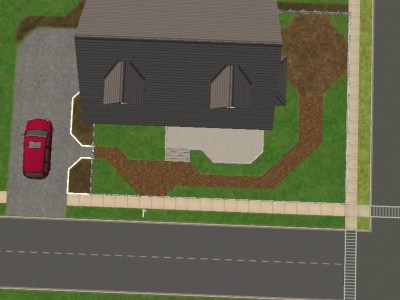
Created: 07.05.2006 - Updated:
07.05.2006
Besides the grass paint,
I'm going to stick with three plants for our
lakeside cottage. The pines will form the
backbone of my landscaping and the oleanders
will fill in blank spots and provide color. When
you're working outdoors, white is a natural
eye-catcher. Even though it looks a little dull
right now, those oleanders are going to jump out
and grab you when we've
finished. |
| |
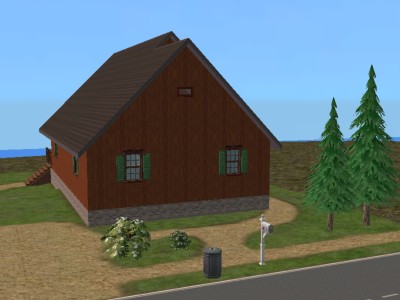
Created: 07.05.2006 - Updated:
07.05.2006
I painted my foundation
with stone and the remainder in a reddish
woodgrain, then added some windows with green
shutters to tie the house to the ground. Notice
how the mailbox and shrubs catch your eye
now? |
| |
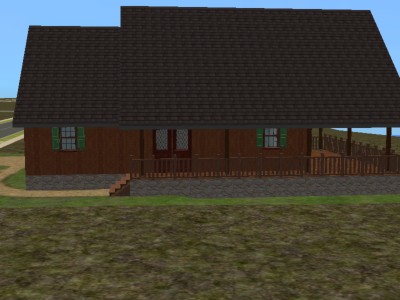
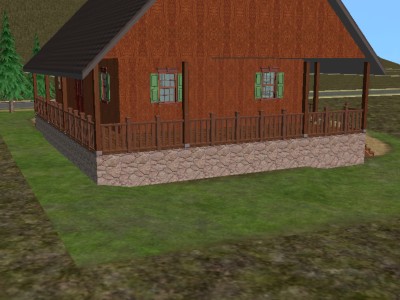
Created: 07.05.2006 - Updated:
07.05.2006
You can clearly see your
original house base here. I lined the deck with
wooden railing and added some columns where I
thought they'd best support the porch
roof. |
| |
Created: 07.05.2006 - Updated:
07.05.2006
To get the columns out of
the way and build them into the railing, open
your cheat window and type boolprop
snapobjectstogrid false.
Open it again
and type moveobjects on.
These two
cheats will allow you to place objects anywhere.
Try to center your columns over the posts so it
looks
nice. |
| |
Created: 07.05.2006 - Updated:
07.05.2006
Remember to avoid blocking
the view from the windows if you can help it.
When you're content with the way it looks, open
the cheat window and type boolprop
snapobjectstogrid
true. |
| |
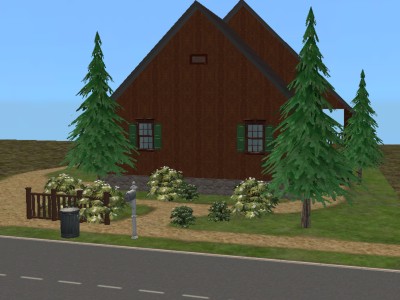
Created: 07.05.2006 - Updated:
07.05.2006
Let's talk about
transitions - moving from one area to another
visually. This mess just doesn't work well. The
trashcan looks too prominent against those
oleanders and the house doesn't tie to the
street. I want a little mystery on this property
- a choice of directions when I'm standing at
the mailbox, with winding paths leading in
different
directions. |
| |
Created: 07.05.2006 - Updated:
07.05.2006
First, I'll camouflage the
trashcan by giving it a darker backdrop - the
fence. The wood also ties my house into the
ground, that visual transition thing. Now the
tree trunks are more apparent.
Watch this
trick... |
| |
Created: 07.05.2006 - Updated:
07.05.2006
I redesigned the mailbox to
match the windows and shutters. The darker post
also echoes the tree trunks, bringing that
little pine near the front steps into our
awareness and shortening the distance the eye
has to travel between dark verticals.
Now
for that sense of mystery and adventure I was
talking
about... |
| |
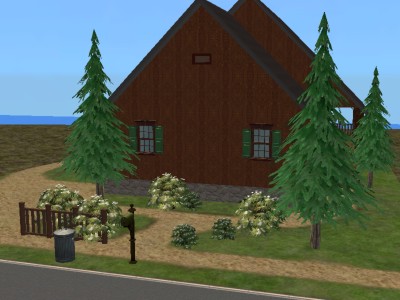
Created: 07.05.2006 - Updated:
07.05.2006
Imagine standing at the
mailbox, looking down a lane of foliage at the
focal point - that oleander smack dab in front
of you. Your eyes travel left, then right. It's
decision time... which way do I go? Suddenly,
you spy a patch of white and you automatically
turn in that direction. See that little
sprinkling of daisies under the short pine by
the steps? Bingo - you're drawn.
Open the
cheat window and type moveobjects
off. |
| |
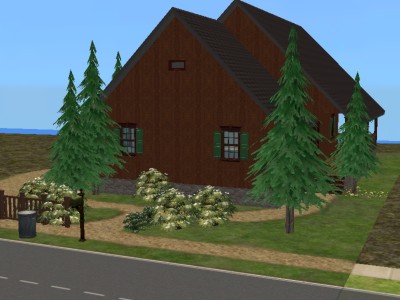
Created: 07.05.2006 - Updated:
07.05.2006
With the addition of
another short pine, the view from the window on
the left was blocked. I moved the window. To
pull the property into the street, I painted
dirt around the
mailbox. |
| |
Created: 07.05.2006 - Updated:
07.05.2006
Now it's tour time. One
tall pine breaks up the long face of the
building's side. Another oleander near the rear
steps directs us to walk that
way. |
| |
Created: 07.05.2006 - Updated:
07.05.2006
Can you smell the
citronella? |
| |
Created: 07.05.2006 - Updated:
07.05.2006
And here's our entry. Those
sprinkled daisies sure are an eyeful against all
the dark stone and wood, aren't
they?
Let's see how our house looks in
Neighborhood view and get a
price. |
| |
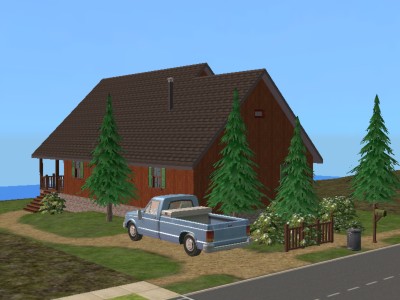
Created: 07.05.2006 - Updated:
07.05.2006
$19,093 - 1BR, 1 bath
lakeside cottage with unfinished basement,
driveway, and wood stove.
SOLD!
Should we clone it? Oh... alright.
Done.
Ready for another
one? |
| |
Created: 07.05.2006 - Updated:
07.05.2006
Another of my favorite
bases is a 14x9 house on a 3x2 lot. It's got a
full basement, walls, and a driveway. That's it.
Go ahead and build one, then clone
it.
We're going to turn this base into a
typical American suburban
home. |
| |
Created: 07.05.2006 - Updated:
07.05.2006
We'll start with a little
symmetry. I simply extended some 2x1 sections of
foundation across the front of the
building. |
| |
Created: 07.05.2006 - Updated:
07.05.2006
To give it a little shape,
I then added some diagonals for a window well
and an 8x4 slab for a
porch. |
| |
Created: 07.05.2006 - Updated:
07.05.2006
The diagonal walls give
your house a little more
character. |
| |
Created: 07.05.2006 - Updated:
07.05.2006
Now I'll temporarily
destroy the symmetry by curving the porch around
the dining room window bay. I'll mirror the
curve later and in a different
way. |
| |
Created: 07.05.2006 - Updated:
07.05.2006
With some cheap flooring, I
laid 2x2 bases for faux dormers above each
window
bay... |
| |
Created: 07.05.2006 - Updated:
07.05.2006
...enclosed them on 3
sides... |
| |
Created: 07.05.2006 - Updated:
07.05.2006
...then covered them with
gabled
rooves. |
| |
Created: 07.05.2006 - Updated:
07.05.2006
One long gable covers the
first floor window bays as well as the
dormers. |
| |
Created: 07.05.2006 - Updated:
07.05.2006
I then added windows,
doors, and steps. The long windows and door are
from MTS2.
How about some illusion - a
touch of
whimsy? |
| |
Created: 07.05.2006 - Updated:
07.05.2006
Let's paint on a faux
garage door using white siding and some privacy
windows. Now we just need to curve the driveway
into the
"garage". |
| |
Created: 07.05.2006 - Updated:
07.05.2006
Open the cheat window and
type moveobjects on.
Using flower
border, draw a rough outline of a curved
driveway. |
| |
Created: 07.05.2006 - Updated:
07.05.2006
You can take off the
sidewalk and then level the entire drive area.
Sell the driveway for
now. |
| |
Created: 07.05.2006 - Updated:
07.05.2006
Draw your edging between
the property and the street and then SHIFT-click
to fill the driveway area with cheap flooring to
mask it. |
| |
Created: 07.05.2006 - Updated:
07.05.2006
The base plant for our
typical American suburban home will be grass. Go
down to the lowest level and paint your property
with it. Don't forget the little strip across
the
street. |
| |
Created: 07.05.2006 - Updated:
07.05.2006
Now we can remove the
flooring on the driveway area and create a
stencil with flower border and flooring so that
we don't get paint on the
grass. |
| |
Created: 07.05.2006 - Updated:
07.05.2006
The stencil allows us to
use a larger paint tool and speeds up the
painting. I'm using a gravel paint that I found
at
Parsimonious. |
| |
Created: 07.05.2006 - Updated:
07.05.2006
Once you've got your
driveway painted, you'll need to touch up the
edges beside the diagonal
bits. |
| |
Created: 07.05.2006 - Updated:
07.05.2006
Remove the flooring and
border and then adjust your curves using the
grass and driveway paints.
Demolish the
remaining border, then open the cheat window and
type moveobjects
off. |
| |
Created: 07.05.2006 - Updated:
07.05.2006
Now we can replace and
redesign the driveway. This one is invisible
too.
I added a fence and gates to protect
the kiddies from stray dogs, then another
"garage" window for
looks. |
| |
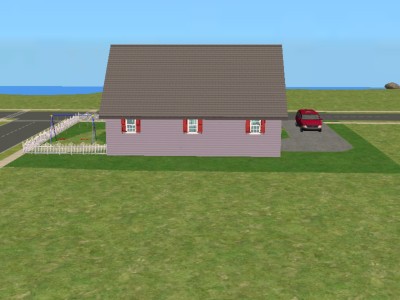
Created: 07.05.2006 - Updated:
07.05.2006
Choose your exterior
materials and then paint your house. Add porch
flooring as well. My house is covered in a very
boring gunmetal grey color just so that I can
show you how landscaping can really make an
impact.
Feel free to make yours a pretty
shade, though. It's your house. Yellow's
nice and
sunny. |
| |
Created: 07.05.2006 - Updated:
07.05.2006
So's red, but a little bit
goes a long way. I'll make the transition from
those sky-high shutters to the ground using
plants.
You can move that ugly trashcan
using moveobjects
on. |
| |
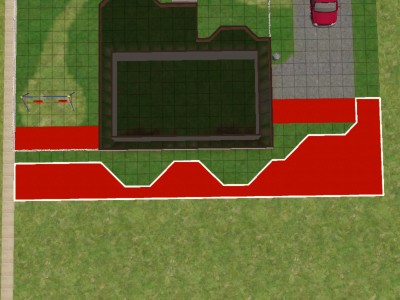
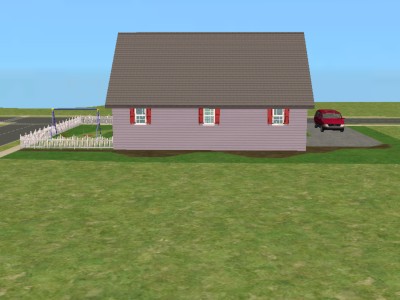
Created: 07.05.2006 - Updated:
07.05.2006
Here's an eyesore. There's
no balance for those two shuttered windows. I'll
fix it by drawing a mansard shed roof across the
dining room windows.
Landwhale
Ho! |
| |
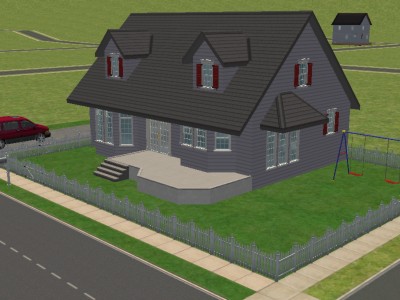
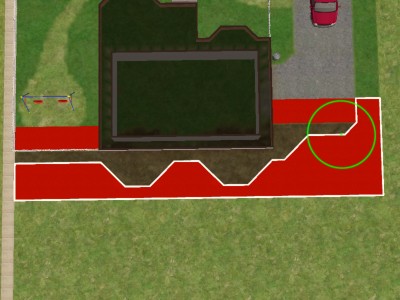
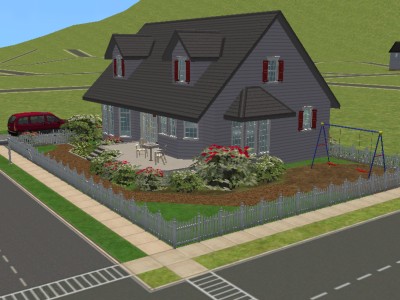
Created: 07.05.2006 - Updated:
07.05.2006
Those seven red spots
create a nice arc from the Landwhale up to the
windows, and down the other side to the
swings.
So. I've got off-street parking,
a safe yard for the kids, and a fun outdoor
activity area. I'm ready for the
landscaping. |
| |
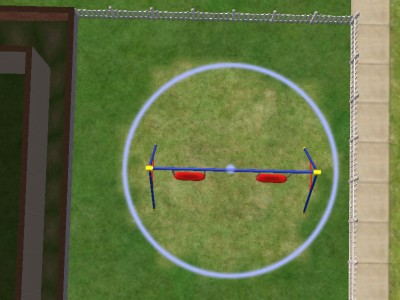
Created: 07.05.2006 - Updated:
07.05.2006
First, I'll kill the grass
under the swings by holding CTRL with the medium
terrain paint tool
selected... |
| |
Created: 07.05.2006 - Updated:
07.05.2006
...then do the same thing
around the steps and gates, using the small
tool. |
| |
Created: 07.05.2006 - Updated:
07.05.2006
With the small brush still
selected, I'll connect the bare spots in natural
looping curves by erasing the grass
paint. |
| |
Created: 07.05.2006 - Updated:
07.05.2006
I turned off the paint tool
so I could see the grid. These paths follow it
so closely that I've got a choice as to whether
to use flooring or paint.
I'll think
about it while I look for
trouble. |
| |
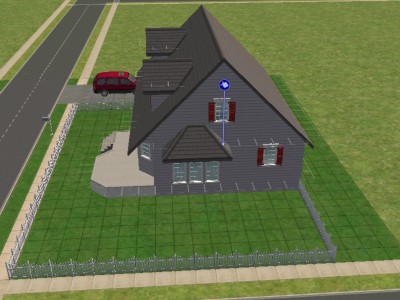
Created: 07.05.2006 - Updated:
07.05.2006
This house faces the water.
The view from the front door gives a clear line
of sight to the mist on the water. I don't want
to block it, which means that anything I plant
out here will have to be short - or have such
fine foliage that I can see through
it. |
| |
Created: 07.05.2006 - Updated:
07.05.2006
From the living room, we
have a lovely view of the Landwhale's butt. I'll
have to do something about
that. |
| |
Created: 07.05.2006 - Updated:
07.05.2006
There isn't much of
interest outside the dining area
windows. |
| |
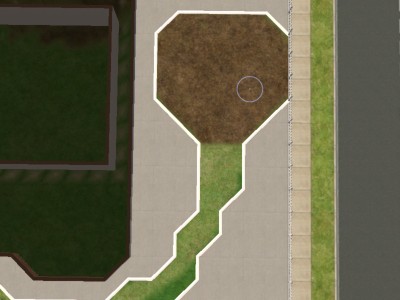
Created: 07.05.2006 - Updated:
07.05.2006
Remember those faux
dormers? This little 4x5 attic room is
mine. Hands
off! |
| |
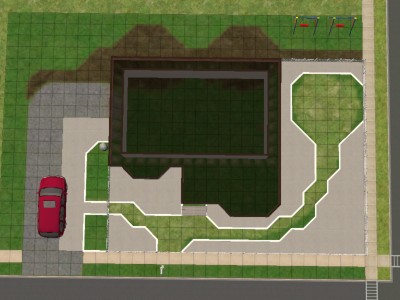
Created: 07.05.2006 - Updated:
07.05.2006
My neighbors are going to
use their backyard a great deal because of the
view. But they don't want to see my Landwhale,
the dead grass, or blank grey faces. They
do want to see the water, so I won't
obstruct their view. They might steal my
newspaper.
First - let's keep the
neighbors
happy. |
| |
Created: 07.05.2006 - Updated:
07.05.2006
I masked off the edge of
the driveway, some of the dead grass under the
swings, and an uneven band of grass at the
property line by creating a
stencil. |
| |
Created: 07.05.2006 - Updated:
07.05.2006
The stencil let me use a
wide brush to paint on some garden
soil. |
| |
Created: 07.05.2006 - Updated:
07.05.2006
Then I removed my stencil
and did the touch-up painting, curving the
planting bed slightly around the
driveway. |
| |
Created: 07.05.2006 - Updated:
07.05.2006
I've decided to use a
combination of flooring and paint on the front
paths, and covered all the grass I want to keep
with a stencil. I'm also going to need planting
beds between the fence and the driveway to hide
the trashcan and the Landwhale's butt, so I
masked off the adjacent areas as
well. |
| |
Created: 07.05.2006 - Updated:
07.05.2006
I painted Park Bark under
the swing area in case the little darlings take
a tumble. Many parks use it for cushioning
because it's degradable and
cheap. |
| |
Created: 07.05.2006 - Updated:
07.05.2006
I contoured the planting
beds beside the driveway to remove corners and
then painted them with garden
soil. |
| |
Created: 07.05.2006 - Updated:
07.05.2006
I then removed the driveway
mask and touched up the soil in the beds. I'm
going to keep the edging because it prevents
folks from walking through the plants in the
beds. |
| |
Created: 07.05.2006 - Updated:
07.05.2006
I then filled in the
driveway surface to the
gate. |
| |
Created: 07.05.2006 - Updated:
07.05.2006
I found some composite
flooring to match the Park Bark at MTS2, so I
used it on the paths. Then I removed the
stencil. |
| |
Created: 07.05.2006 - Updated:
07.05.2006
I expect a nice welcoming
gift from my neighbors. Short poplars from MTS2
line the driveway and hide the Landwhale. An
airy-looking little maple balances them on the
other side. Two sizes of bougainvillea from MTS2
in two different colors stagger along the rear
of the house and hosta from 4ESF lines the fence
behind the
swings. |
| |
Created: 07.05.2006 - Updated:
07.05.2006
Bougainvillea everywhere! A
little red goes a long way, so I alternated with
white. Daisies in a bordered bed line the path
between the steps and the side
gate. |
| |
Created: 07.05.2006 - Updated:
07.05.2006
A few splashes of red
connect the shutters to the ground. Tour
time! |
| |
Created: 07.05.2006 - Updated:
07.05.2006
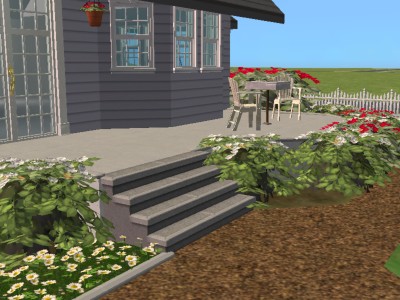
From the front gate, we can
see a cheerful entry. I redesigned the flower
bed edgings to match everything else and
splashed garden soil paint under the shrubs to
help ground
them. |
| |
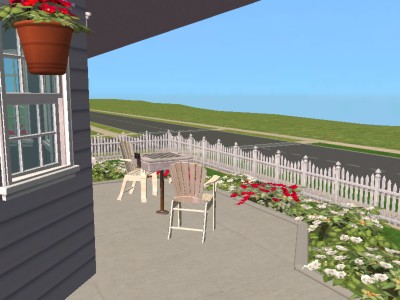
Created: 07.05.2006 - Updated:
07.05.2006
From the front door, we
have an unobstructed view of the water. Chess
anyone? |
| |
Created: 07.05.2006 - Updated:
07.05.2006
The giant white
bougainvillea hides the Landwhale's butt and
won't interfere with the inside color
scheme. |
| |
Created: 07.05.2006 - Updated:
07.05.2006
A spot of red pulls our
eyes out the dining room window and beyond to
the water.
As much as I'd like to show
you some more of Mountainside Village, we're out
of space. It'll have to wait until next time.
Until then, here's your Neighborhood
photo... |
| |
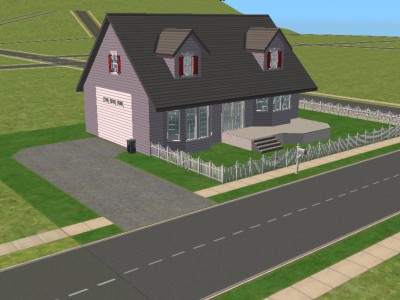
Created: 07.05.2006 - Updated:
07.05.2006
$20,030 - Typical American
suburban home.
If you know of any sites
to find outdoor plants, please sign my
guestbook. I'd appreciate it very much. Thanks
for reading and remember to clone! ~
Polly |
 |
Created: 07.05.2006
Updated: 07.05.2006
A beginner's guide to
outdoor cheats and landscaping
|
 |
Created: 07.05.2006
Updated: 07.05.2006
That's some view, isn't it?
I could sit here all day while my poor sims are
slaving away in the city. But we're here on Blue
Soup's Mountainside Village island terrain from
MTS2 to build some vacation homes for the poor,
hard-working things. The gardeners have off this
summer, too. I'm using Two Jeffs' No
Gardeners hack. I also found lots of plants
at 4ESF and MTS2. Go look - I'm in no
hurry.
Back already? OK - let's get to
work. First, though, prepare yourself. I'm about
to show you something really scary...
|
 |
Created: 07.05.2006
Updated: 07.05.2006
Frightening, isn't it? Ever
since Nightlife, with its ability to clone any
lot put into the Lots & Houses Bin, I've
been using bases to save building time. This one
is a 9x14 house base on a 2x3 lot. It's got a
basement, four walls, a driveway, and nothing
else. We're going to turn it into a little beach
house.
I've disabled shadows in order to
show clearer pictures. It's under Game Options.
|
 |
Created: 07.05.2006
Updated: 07.05.2006
Once you've got your base
built, you should clone it because we're going
to use it for another project.
Construct
your roof. A gable shed roof creates a 5x9
(usable) area on the 2nd floor. The three tiles
under the lowest point of the roof aren't good
for anything. |
 |
Created: 07.05.2006
Updated: 07.05.2006
I found this weathered
siding on TazziannaLuck's simpage. It looks
beachy enough for me. Find something you like
and splash it on.
|
 |
Created: 07.05.2006
Updated: 07.05.2006
Big 2-story windows on each
side will light up both floors.
|
 |
Created: 07.05.2006
Updated: 07.05.2006
Some Tornado Steel fencing
and weathered board decking creates another 5x9
area overlooking the water.
|
 |
Created: 07.05.2006
Updated: 07.05.2006
I want a pool on this lot,
which will go in back. The entrance should be
centered between the living area, pool, and
driveway. We'll also need some sort of path
between the entrance and the mailbox. We do
not want to block the view between the
street and the water so I'll use a bridge
foundation for the porch. To keep the informal
look, I'm going to use terrain paints instead of
flooring wherever I can, along with an invisible
driveway from MTS2. Ready?
|
 |
Created: 07.05.2006
Updated: 07.05.2006
The 4x4 porch is finished
using the same decking and rail as the upper
deck, with steps in front and back. I covered
the entire lot in sand terrain paint, then used
Simply Styling's pretty rock paint as driveway
and path surfacing. The path curves from the
steps to the driver's door. It also traces an
S-shape to the mailbox & trashcan and around
them. The island between the driveway and path
is filled with a yucca and some cacti. Palms in
3 heights follow the roofline down to the
sidewalk, thereby emphasizing an architectural
feature. The mailbox post is redesigned in a
weathered grey wood.
|
 |
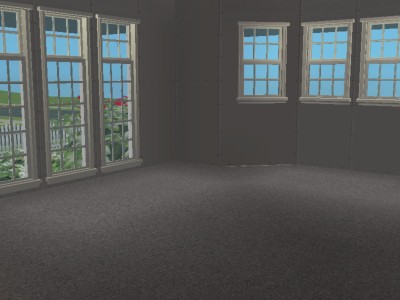
Created: 07.05.2006
Updated: 07.05.2006
The looping path created a
blank face under the window, which I filled with
lavender bougainvillea. More of the shrub fences
off the backyard. I used a dried grass paint
from Tribecca Sims beneath the plants. Shadows
are still off. |
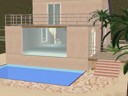 |
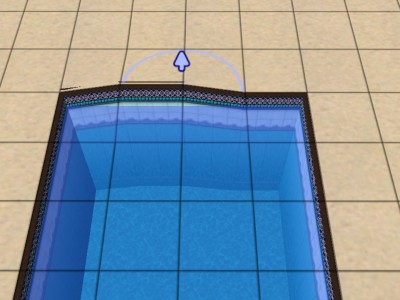
Created: 07.05.2006
Updated: 07.05.2006
Peeking through Numenor's
glass walls, you'll see spiral stairs from MTS2
that connect the two floors. Although expensive
($3000), they're a great space-saver. This main
room - living and kitchen area - overlooks the
pool, which is surrounded by more of Simply
Styling's rock paint. I painted the pool walls
to match the inside floor. The invisible diving
board and ladder are also from MTS2.
|
 |
Created: 07.05.2006
Updated: 07.05.2006
To paint pool walls:
Open
the cheat window by holding CTRL and SHIFT, then
typing C
Enter the cheat boolprop
constrainfloorelevation false
Using your
shovel tool, raise the edge of the pool by 2
clicks or so. |
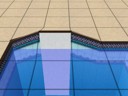 |
Created: 07.05.2006
Updated: 07.05.2006
Select your paint and fish
around for the spot on the wall where it will
stick. I have the best luck near the top edge.
When you find it, hold down the SHIFT key and
click to cover all the walls.
|
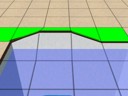 |
Created: 07.05.2006
Updated: 07.05.2006
Using your shovel again,
level the edge you raised.
Open the cheat
window and type boolprop
constrainfloorelevation true
|
 |
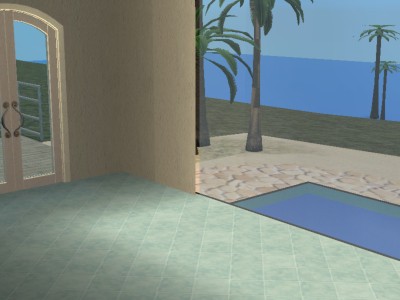
Created: 07.05.2006
Updated: 07.05.2006
Muted pastels and the glass
wall let that fabulous view act as the focal
point for your main room. Who needs art?
|
 |
Created: 07.05.2006
Updated: 07.05.2006
To enhance the appearance of
your little house, you can contour the terrain
to create a dune effect. If it's too dark
inside, you can add some small windows under the
roof edge like I did here. Then just pop your
finished house into the Lots & Houses Bin to
clone it so you can line a whole street with
these little beauties.
|
 |
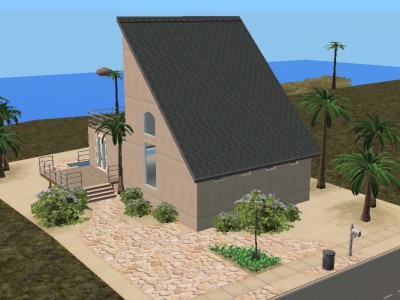
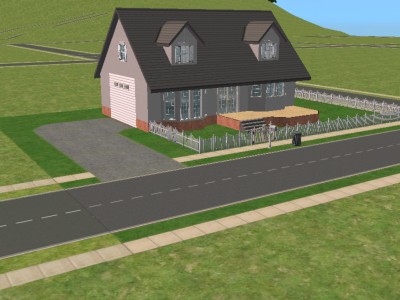
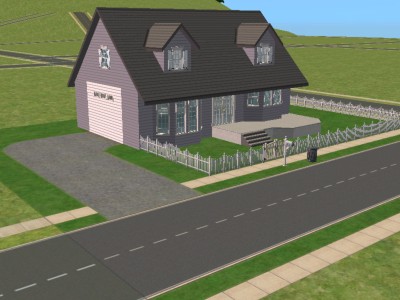
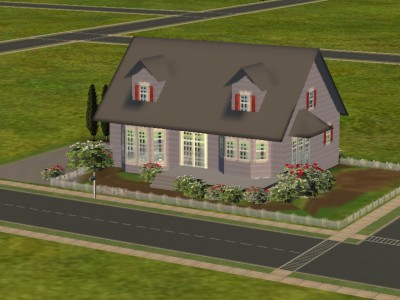
Created: 07.05.2006
Updated: 07.05.2006
Here's how it looks in
Neighborhood view.
$22,407 - 1BR, 1 bath
unfurnished beach house with full basement,
pool, driveway, deck overlooking bay.
SOLD! Let's build a slightly trickier
one. |
 |
Created: 07.05.2006
Updated: 07.05.2006
This one will be a little
lakefront cabin. We'll use the same 9x14 house
base on 2x3 lot as we used for the beach house.
You cloned your base, right? If not, you should
build another one and pop it in and out of the
Lots & Houses Bin so you can keep a
copy.
Shadows are still disabled here in
Mountainside Village.
|
 |
Created: 07.05.2006
Updated: 07.05.2006
Cover your base with a
long-gabled roof.
|
 |
Created: 07.05.2006
Updated: 07.05.2006
You can use lattice or
bridge foundation for the deck, but I chose the
solid one because I want to paint it. This deck
extends four tiles in back and two on the side
of the house. I left five tiles free in the
front to give it a staggered look.
That
sun is bright, isn't it? Let's cover our deck.
|
 |
Created: 07.05.2006
Updated: 07.05.2006
I built walls around the
circumference...
|
 |
Created: 07.05.2006
Updated: 07.05.2006
...then popped on another
long-gabled roof.
|
 |
Created: 07.05.2006
Updated: 07.05.2006
I then removed the walls.
|
 |
Created: 07.05.2006
Updated: 07.05.2006
We don't need this little
bit of the first roof and it will interfere with
a loft room, so I demolished it. That gives us a
5x9 loft area that wouldn't have been here if
the sun wasn't so bright.
|
 |
Created: 07.05.2006
Updated: 07.05.2006
See the stagger? It doesn't
block the view much more than the base house
did, but effectively doubles our space. Add your
front steps...
| Show
all Images | |
   |
|
|
|
 | |
|
 | |