


From the last exercise we know that T-mog’s A-buffers generally suck (Unfortunately, even with Transmogrifier 2.0 they still suck). We’ve got a simple way of fixing them, but maybe like me you’d rather get all your buffers done at once rather than have T-mog create them and then have to fix them.
This time I have two zips for you – one is an object, and the other is some bitmaps to replace your p and z sprites. You’re going to do the a-sprites.
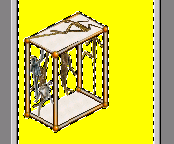
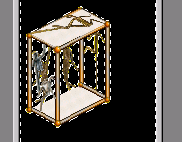
We’re going to make a "Strange shape on the wall". It is exceedingly ugly, but it has the right fiddly bits to show how a-buffers can work.
 |
Pop the object in the transmogrified folder – same as last time. |
|
The same as last time – export them with "All channels, 1 zoom" (For this exercise, we don’t care about mid or far views). |
|
Now take the bitmaps from the other zip, and put them into the sprites folder – they should overwrite existing bitmaps. (I've done the P and Z sprites for you already). |
|
Open up your drawing program – and open up your p-sprite and a-sprite. You are going to use the P-sprite to create your A-sprite. P-sprites have a suffix of -p, A-sprites have a suffix of -a. |
| Change your p-sprite to millions of
colours from the Standard Menu, choose Colours, Increase Colour Depth, 16 Million Colours. [Shift-Ctrl-0] This is so we can use layers in the p-sprite. Don’t worry we won’t be saving the p-sprite this time so it doesn’t matter what we do to it. (If you do save the P-sprite by accident, just re-copy the bitmap from the zip you downloaded.) |
Create a new layer – from the Standard menu choose Layer, New Raster Layer.
Then activate the background layer again [Ctrl-1]
The new layer will be used for the a-sprite. Once we've set it up here, we'll be copying and pasting it into the a-sprite bitmap.
 |
Select the mask tool [M], and click on
the yellow background, then go and select similar. Selections, Modify,
Select Similar)
All the yellow bits should be selected. Choose the new layer without cancelling the selection [Ctrl-2]. You can do this either by the keyboard or using the layer window. |
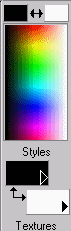
Change the tool to fill ![]() [F] (Select is still on). Make sure the foreground colour is pure black (0,0,0)
and click on a selected area. (What happens if it isn't pure black? It thinks
it's a transparent part of the object!)
[F] (Select is still on). Make sure the foreground colour is pure black (0,0,0)
and click on a selected area. (What happens if it isn't pure black? It thinks
it's a transparent part of the object!)
 The foreground colour on the Colour bar should be set to black. |
The new layer should have the black on it now. |
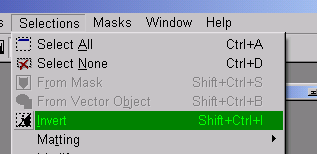 |
Invert the selection [Shift-Ctrl-I]. This
is going to be the white area.
Set the foreground colour to pure white (255, 255, 255) and click on the selected area. (You still have both a selection going, and a fill tool).
|
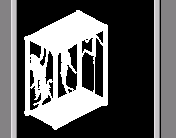 |
Now the object is white.
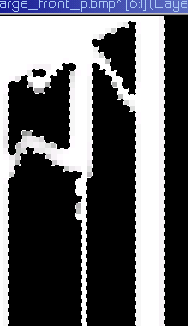
If we were to import it now – it would not look good. The edges are all jagged and rough.
|
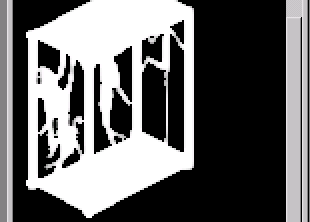 |
We’re still selected on the white area,
so we’ll do the Edge preserving smooth the same way we did it in the
last exercise. (Effects, Noise, Edge Preserving Smooth – Smoothing=30)
Notice that that this time the edge is lighter – that’s because we are doing it between white and black rather than dark gray, white and black. It looks OK though.
|
|
|
EXCEPT! This bit is not looking good. Now we know that the darker something is, the more transparent it is. That means that this bit is going to look weird. So what we want to do is make just this section opaque. |
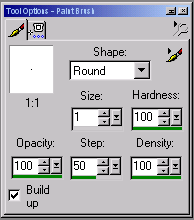 |
Still got the select going I hope!
And the White should be the foreground colour. OK. Choose the Brush tool, and set up the options as follows:
|
 |
OK now brush the offending pixels back to
white.
Notice because we’ve left the selection on, that if we stray into the non-selected area, nothing happens. See – we can colour inside the lines! Remember – if you make a mistake Ctrl-Z Undo will reverse it.
|
Tip: PSP7 Keeps a History of Actions which you can move up and down using Undo [Ctrl-Z] and Re-do [Alt-Ctrl-Z]. When you are using the paint brush, click often - this records the brush strokes as separate actions. That way you can do a little too much and then undo back to just right.
 |
So Now it’s done. Ctrl–D to turn off
the selection.
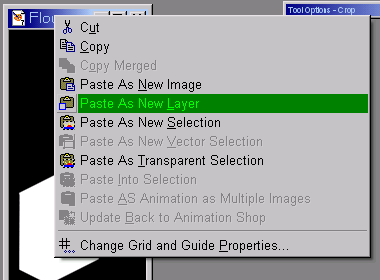
Ctrl-C to copy the layer we’ve just created. Now select your A-sprite and "Paste as Layer" onto the existing layer. Note: Because the layer is the same size, we don’t have to move it or anything – it is already in the right place. (Right Click the A-sprite header, and choose "Paste as New layer")
|
 |
Close the P-Sprite
WITHOUT Saving. (Don’t worry if you saved it accidentally – just unzip
it again and overwrite the P-sprite again. Like you did at the beginning.)
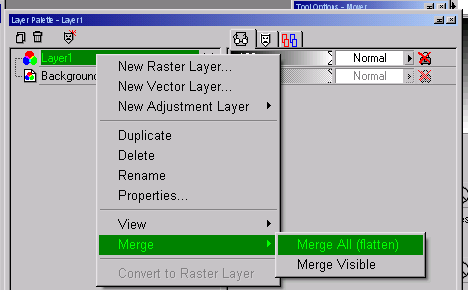
We have 2 layers in our A-sprite. If we try to save it like that, we get a warning message. So first – let’s do a Merge-All so there’s just a background layer, and then save. Ctrl-S to save, and we’re done with the drawing
part. (Once you’ve repeated Steps 2-10 for the other
a-sprite/p-sprite pair) Off you go - we'll wait here for you until
you are done. |
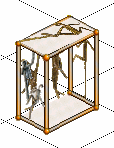 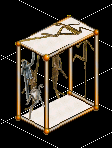 |
Open up T-mog and import the object. Then go have a look. Not bad, huh? I did say it was a strange shape on the wall! LOL. |
Didn’t I tell
you A-buffers are easy?
Well - you can go play with your "strange shape on the wall". Alternatively you can do one or the other of the tutorials in this series: